Charm Bracelet with a Story to Tell

Originally on Blogger 6/25/11

30 Days of Creativity Day 10

I was cleaning out my cabinet where I keep my jewelry when I found a little pile of sterling charms.  I remembered that a “few ” years ago I had made a special request at Christmas.  I asked that Marty give me a sterling charm bracelet.  I then asked that the kids each get me a charm that represented them.  That year they all did just as I asked.  I am sure I was thrilled at the time and I put all the pieces in a safe place until I could get it together.

So…here it is a few years later-not put together! I gathered all the charms -some from then and some that were new and set about putting it together. Every charm had a story.

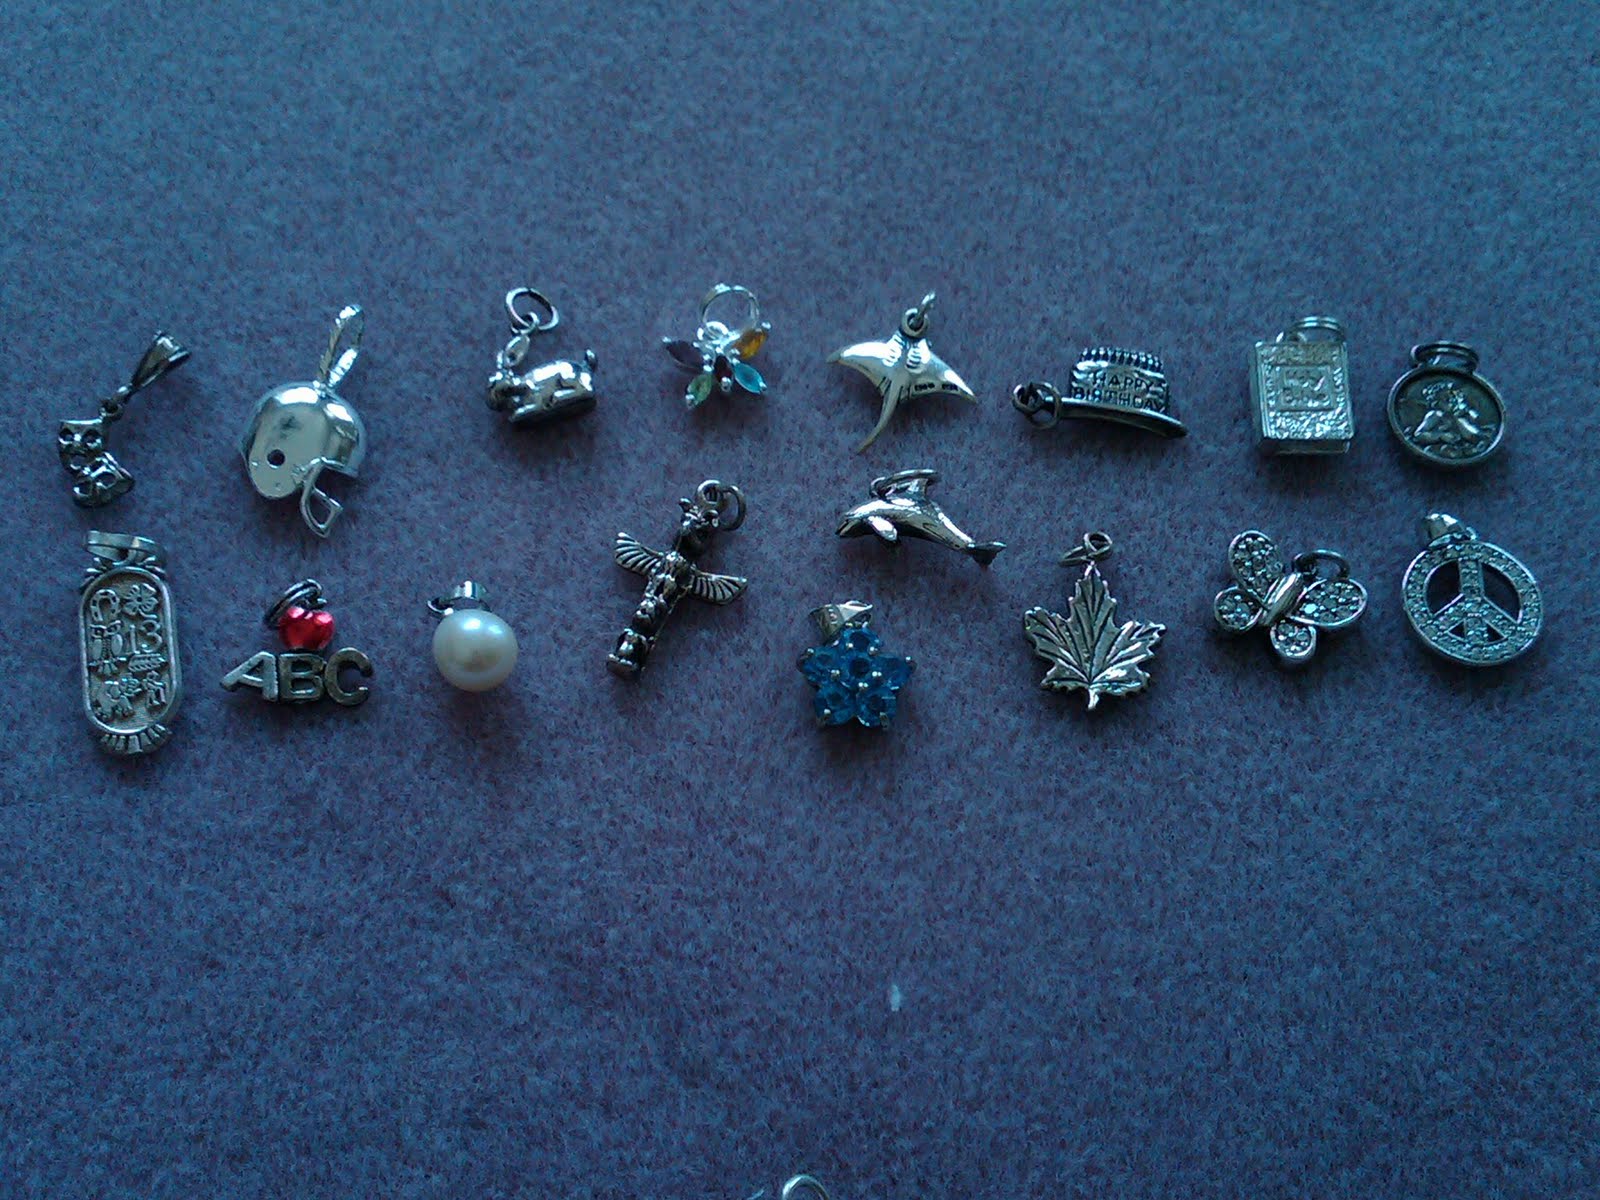
Katie gave me the comedy/tragedy charm.  Perfect.  She had always wanted to go into performing and was involved in many performances through high school.  Josh gave me the football helmet as he was playing football at the time. Here my memory gets fuzzy but after talking to Megan, we think she gave me the crystal butterfly.  She may have given me the bunny but I may need to talk to niece Rachael about that.  The stingray and dolphin were purchased when Megan and I went to Discovery Cove. The Birthday Cake may have been given to me by Marty-my birthday is Christmas Day. The Bible and Angel…not sure.  May have to talk to sister Daun on this.  It is possible my niece/nephew also gave me charms that year.  The silver charm on left bottom is from Mexico when Marty took me on the cruise.  It’s neat because it has pictures all over it of things people consider lucky.  The teacher charm…not sure.  The pearl, totem, and blue flower all came from Alaska this last year. The maple leaf I picked up in Vermont when I visited my niece.  The last two I just got this last December.  Marty gave me shopping money for Christmas and Birthday.  I got the charms free when I made a purchase.

As for the charm bracelet Marty bought me-it was in a safe place-I could not find it.  I decided to put the charms on a chain maille bracelet I had made.

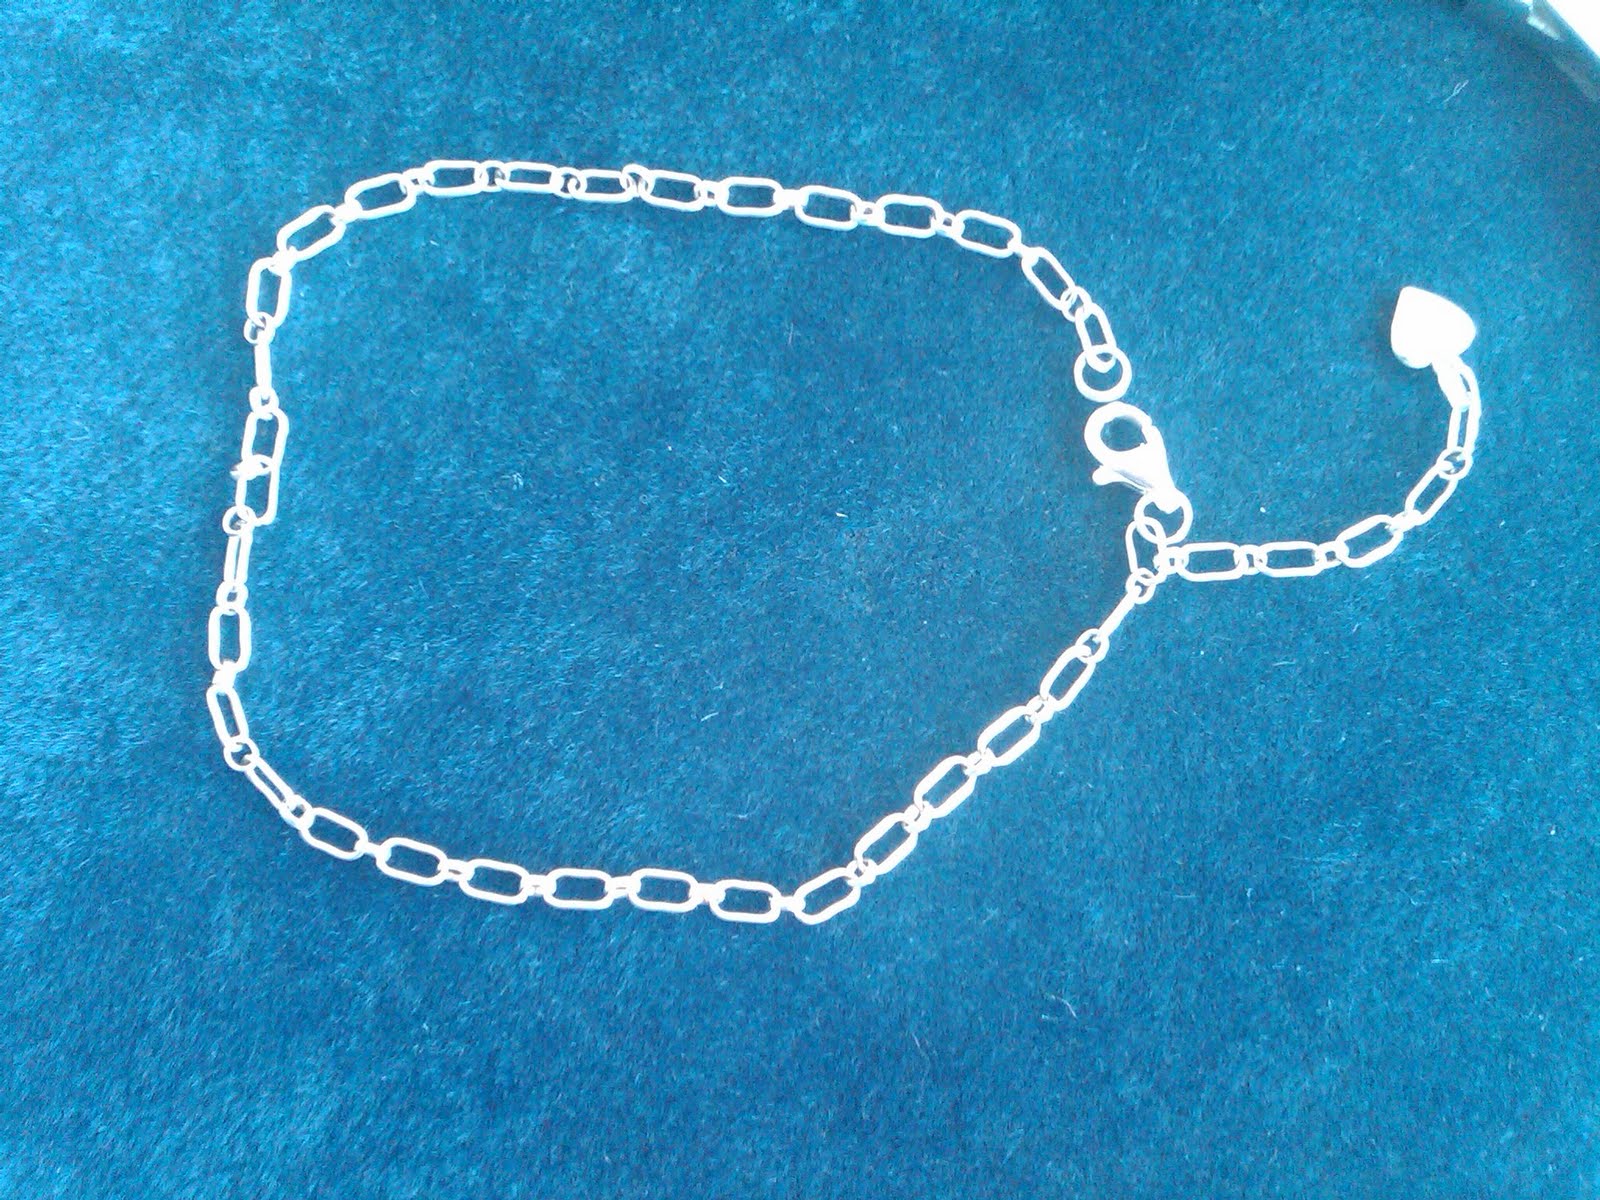
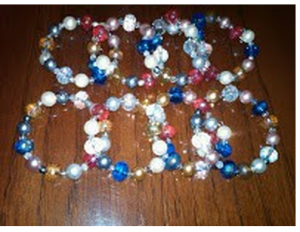
My chain maille bracelet.
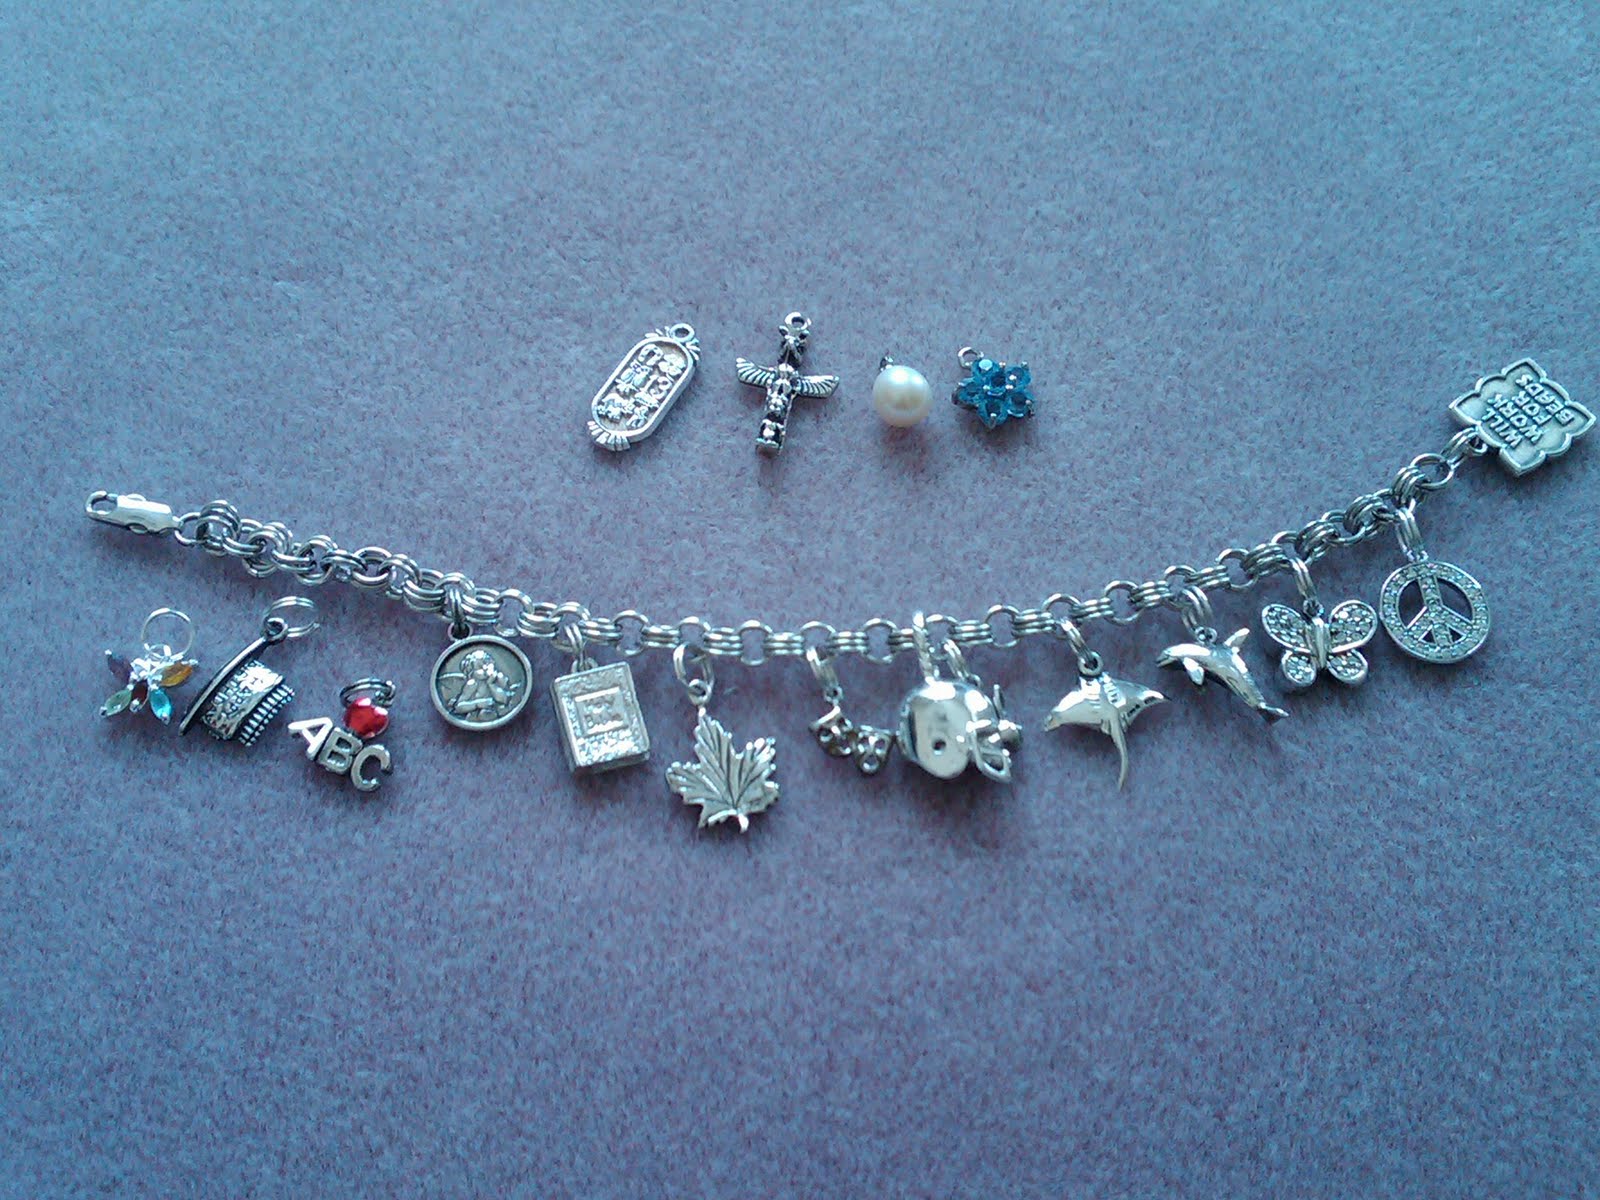
I arranged the charms in order-four didn’t make it!

I laid out the bracelet, then arranged the charms as I thought I would put them on. I slipped the football charm right over the clasps and to the middle-it had a very large bale and did not need a split ring. In sorting I-four charms that just didn’t seem to go. They are pictured at the top of the bracelet.

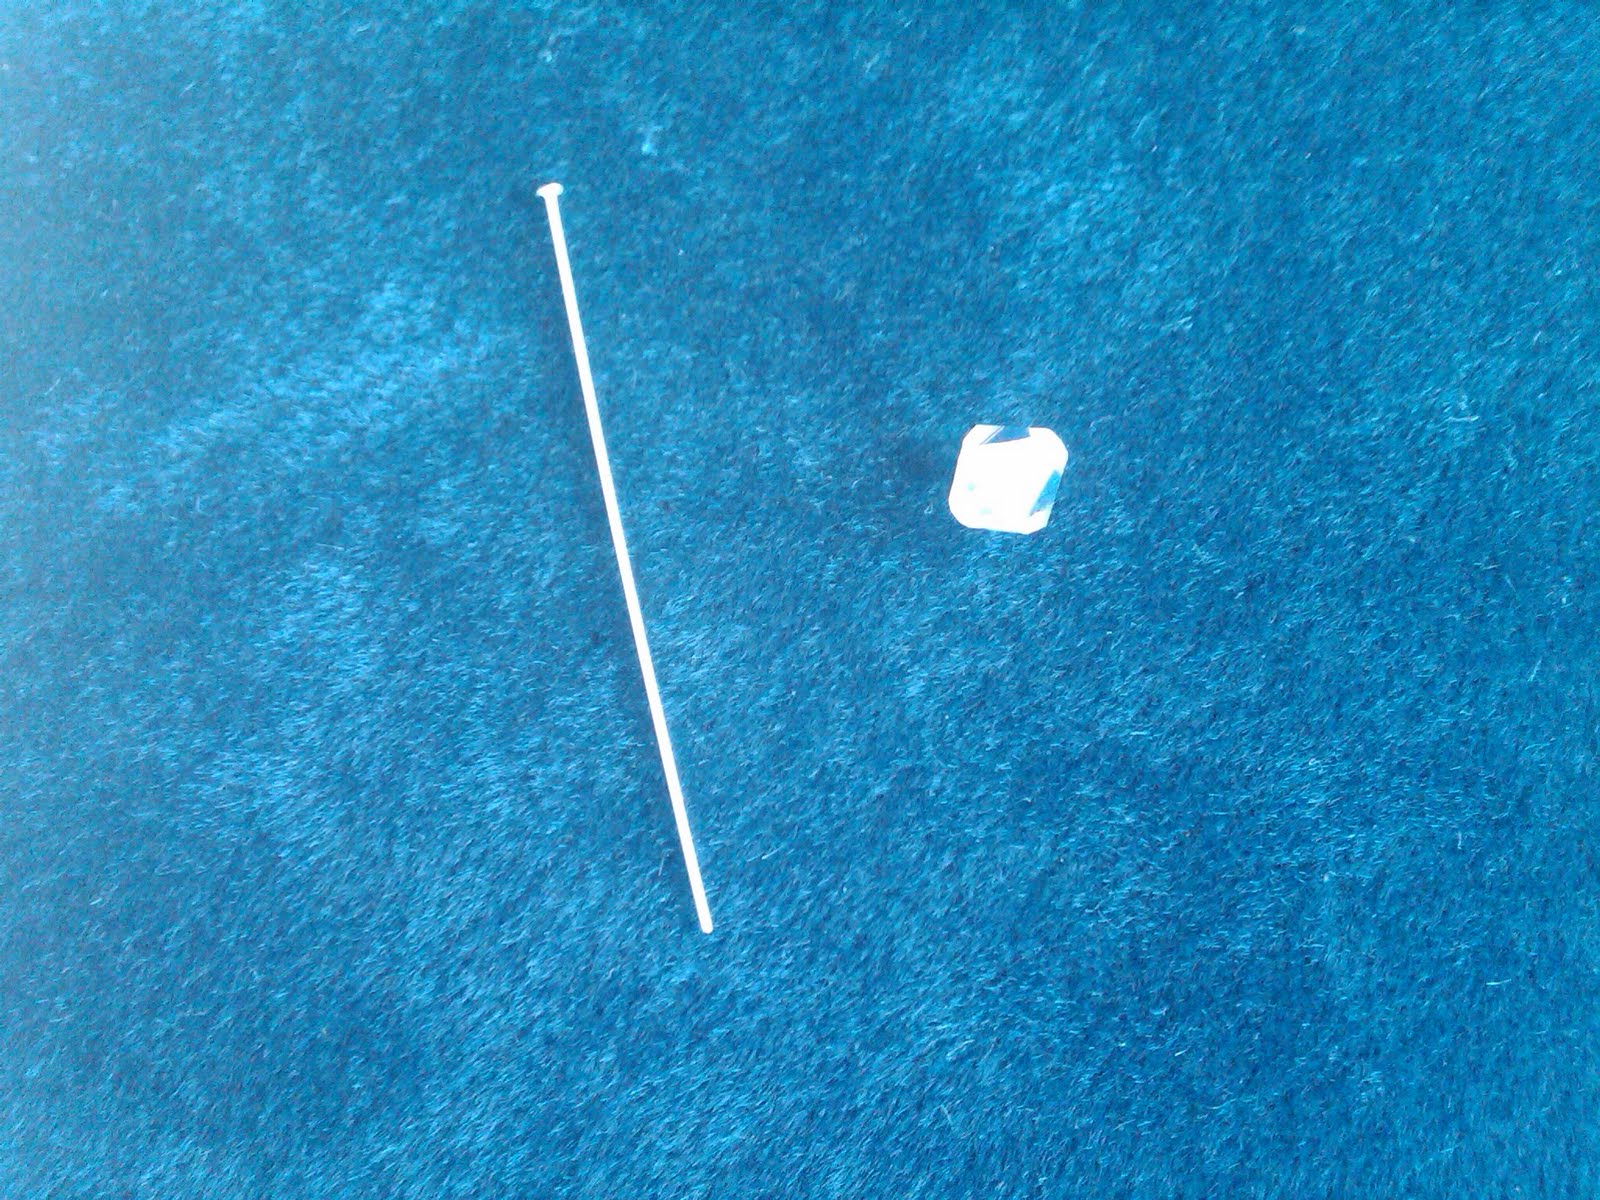
I put each charm on a split ring and then put it on the bracelet.  The work was a bit tedious but not difficult.  I did use the split ring tool most of the time to open the rings and get the charms on-then to thread it onto the bracelet.  One thing to consider when doing this is the placement of the charm on the chain.  Keep laying the bracelet flat to make sure placement is correct.  My chain maille bracelet had double links-I place charms on the bottom set of links so that it lays nicely.

After getting all the charms on I was pleased but it seemed liked it need more.  I had a necklace I bought but never wore.  While the stones were beautiful the chain was not what I wanted and I did not like the piece.  The great thing about jewelry is once you learn a few skills-nothing is wasted.  You can change/alter/embellish until you are happy.  I decided to put stones in between each charm.

I did not have a lot of space to work withbut I did not want to redo

each stone with a new headpin.

I loved the stones, but not the chain.

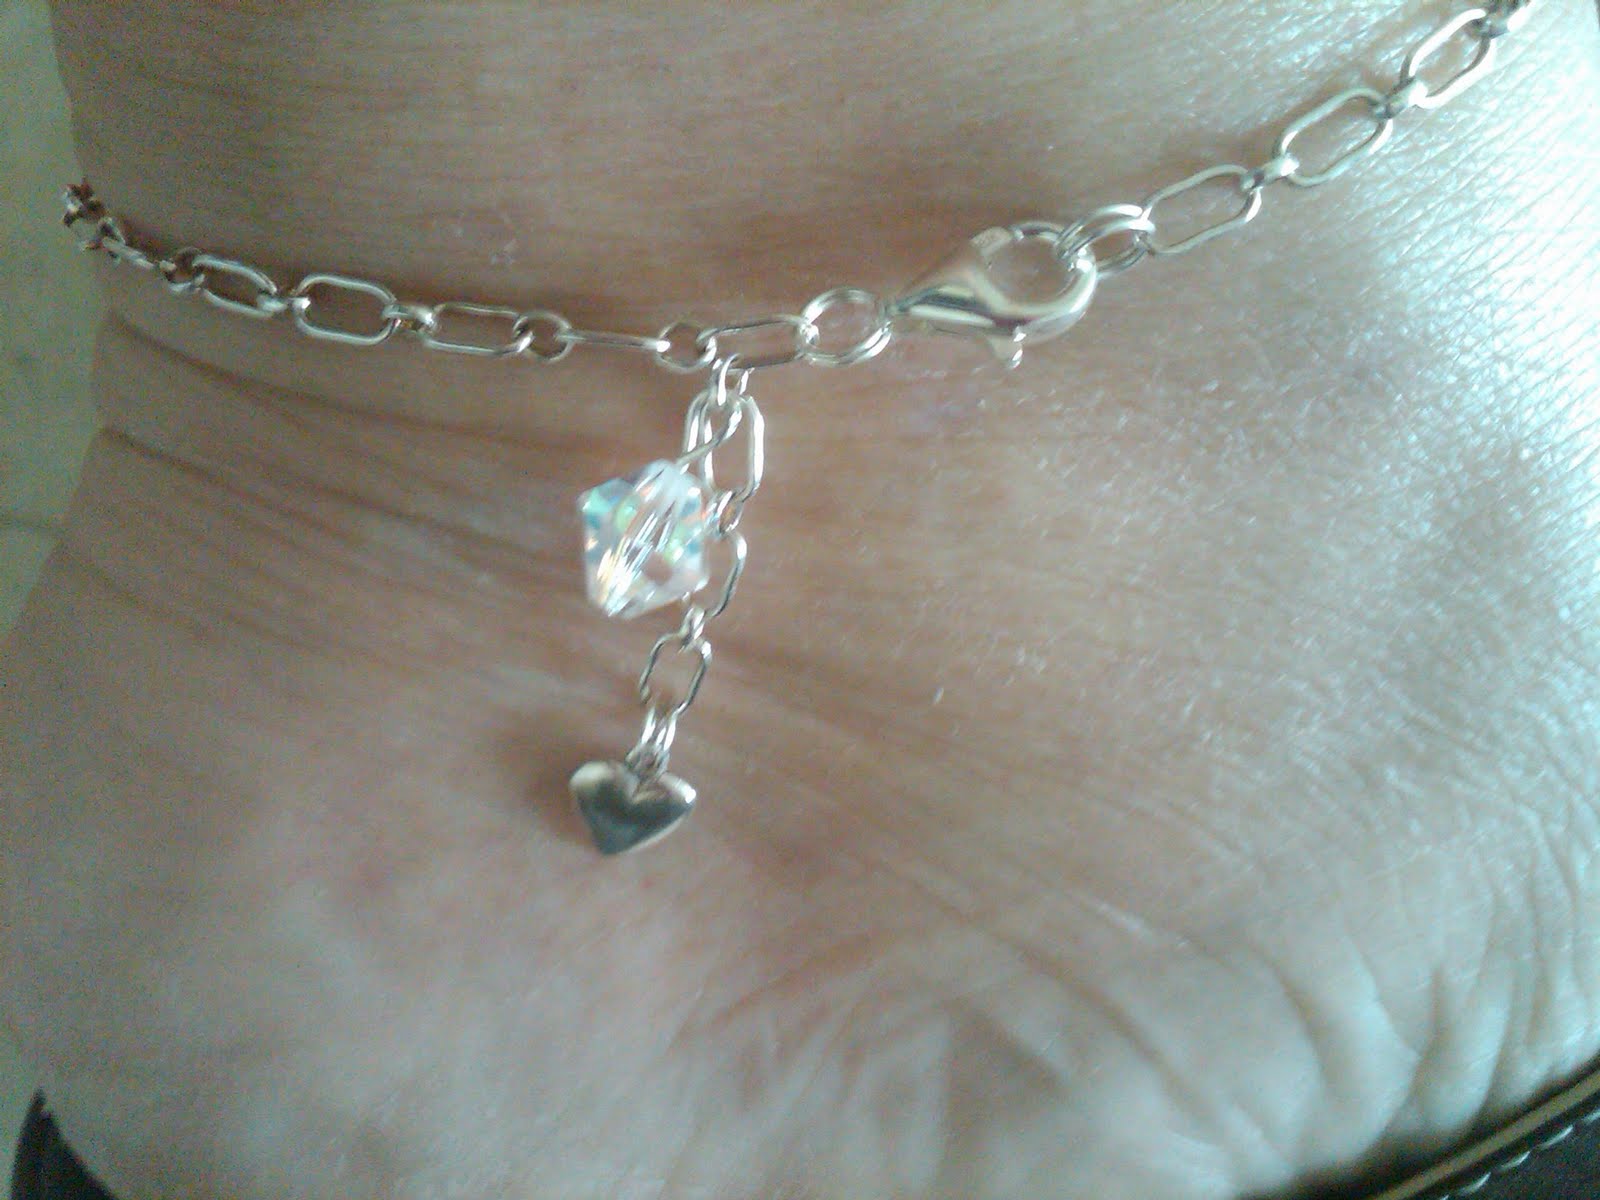
Now this was a bit tricky as each stone was on a short headpin with a loop at the top.  I did not want to redo them so I had a very short piece to work with. The little extra effort was worth it though.  I saved using my stock of headpins and I do like the way the stones are close to the chain and the charms are further away-it adds depth. I was very happy with it when I finished it.  It was nice that while I worked on this, my friend Dawn was here working on a project of her own.  Having company doing projects distracts you from the sometimes mundane parts of the process. Of course I had to add a finishing touch-I had a cool charm and added a Swarovski.  I attached this near the clasp.


It’s too hot to eat and the garbage goes out tomorrow!


Originally posted on Blogger 6/24/11

30 Days of Creativity Day 6

Ok I’m sorry, but I think being creative in the kitchen counts for a lot. If you are the one in your home that does the cooking and meal planning then you know it is one of the most creative things we have to do-every day. I like food to be fresh but it is a real balancing trying to keep food that is fresh in the house and using it before it spoils. I feel awful when food has to be thrown out (or given to my worms) because I did not get it prepared before it spoiled.

As much as I love to cook, some times I just don’t want to.  I’ve exhausted myself with too many other tasks during the day.  Not only that, but after I cook, then I’m going to have to clean up.  My daughter got a good deal when she got married-Jake cooks and she cleans up.  I should have gotten that in writing before I got married.

I was too tired to cook. It was too hot to eat. Garbage was going out the next day and there was the chicken with a lot of meat left on it.  I knew I wanted that carcass in the garbage. The fridge was packed with food yet I did not think there was anything good to eat.  I started to pull containers out of the refrigerator to see what I could make of it.

I deboned the chicken, added clery, onion, and mayo.  My sister-in-law Mary served chicken salad once with a pinch of sugar…I have never left it out since.  I shredded the last of the lettuce onto two plates and piled the chicken salad on top.  I had four containers of hummus-one half empty.  I split that into two mini bowls and grabbed the last of the tomato basil wheat thins. I sliced up the the lastof the tomato, celery,  and cucmber that would not make it another two days.

I fixed it up pretty and served it to the husband.  He was impressed!  As for me, I added a few things to my plate that he would not like.  Lots of black olives and some hearts of palm.

The dinner was great if I do say so myself.  Lettuce, cucumber, celery, and tomato were consumed rather than thrown away (ok I admit the worms got a little bit).  One empty container of hummus was thrown out as well as the chicken carcass and an empty box of crackers.

The refrigerator was cleaner, no food was thrown in the garbage, and I felt more creative than ever!

Next time I don’t want to cook I am going to go through the pantry!

Beading: Agate Wrap Bracelet


Originally posted on Blogger 6/24/11

30 Days of Creativity Day 5

I bought this kit many years ago, someplace, before I knew anything about beading.  You can easily create a project like this yourself with supplies purchased at your local craft/beading store.

Materials:

Assorted beads

Wire Cutters (do not use your nice beading cutters)

Memory Wire (choose size by preference)

Round Nose PliersDirections:

Cut a length of wire that goes a couple times around your wrist.  There is no right or wrong length-this is truly a preference. Do not use your beading wire cutters to cut memory wire.  There is a reason for this!  Memory wire is stainless steel and it is tough to cut.  I bought a pair of cutters I use only for my memory wire and for cutting silk flower stems (I have a neat project to tell you with that later).

Once you have cut the wire to the desired length, use round nose pliers to make a loop at one end of the wire-this will keep beads from coming off.

Start putting on beads. Alternate colors, sizes, and types.  If you have a specific pattern you want to follow, you may want to lay the pattern out first on a mat.  This way you will not have to keep looking to see what comes next. I also have one made from pearls that I like very much!

When the wire length is covered, make a loop in the other end as well to keep the beads on.

This is a fast easy project that is great for people that have never done beading.  It is a great activity for a party (like a girl’s birthday party or girl’s night out) because few tools/skills are needed. You can make it a bit of a memory project by having each person bring beads and everyone swap.

If you like this project, you may also like making beaded napkin rings.  These make a wonderful gift and the process is the same. I have also seen memory wire in ring size!

Beading: Swarovski Anklet

Originally on Blogger 6/24/11

30 Days of Creativity Day 15: Swarovski Anklet

I saw someone with an anklet that was different than the ones I had.  As I love beads (especially Swarovski crystals and natural stones) I have several anklets made of each.  I have had anklets made of chain in the past (before my beading days) but I must have broken them all.

This anklet was different because instead of simply circling the ankle, it had a chain section dangling with a charm on the end of it.

If you have some beading skills or get a little help-this is a pretty easy project.

Materials/Tools

sterling chain 2 inches longer than ankle width

3 or more split rings

sterling clasp

charm

accent bead

headpin

split ring tool (if possible)

cutter pliers

round nose pliers

chain nose pliers

Directions:

I don’t know that I will ever claim to be an expert at anything but I am pretty quick and sensible on projects.  I will tell you how I went about the process-it does mean it is the only way to do it.

First I connected my lobster class to a split ring.  I connected the split ring* to one end of the chain. This is one end of my anklet.

Then I put the chain around my ankle as if I was going to wear it, and made note where I wanted to fasten the lobster claw.  I attached a split ring to the chain at that spot. If you have a split ring tool it can be a great help.  Now I had a chain with a clasp with loose chain dangling. I attached my heart charm at the end of the long dangling piece of chain.

I wanted to add a Swarovski crystal for a little sparkle. For this I needed a headpin and the crystal. I put the crystal on the headpin and bent the headpin over at the top of the crystal-leaving about 1/4″.

Headpin and crystal.
Crystal with bent and cut headpin.
Crystal with loop-ready to attach.

Taking the round nose pliers, I made a loop on the crystal so that I could attach it to the chain.

After that, it was just a matter of adjusting and I changed things many times: the length of the chain, placement of the bead, etc.  In the end the dangling chain was about 1.5 inches.  The bead was connected at the same link of the chain where the dangle started.  That is where it looked best.

*If you are not familiar with split rings, they are a finding used to connect pieces in jewelry making. The best way to describe them is to say they look like a key ring-several loops. A jump ring would only be one loop. While you can buy soldered jump rings, most have an opening as you need to open them to attach. I prefer split rings as the several loops add more strenght. Also, if your chain/charm/jewelry gets snagged, it takes a lot to toally have your piece pulled apart. Usually I can feel it happening and am able to save the piece because the split ring takes a bit to completely uncoil.

30 Days of Creativity: In Honor of Lexi

Originally on Blogger 6/24/11

30 Days of Creativity: Day 1

When I heard about the 30 Days of Creativity challenge I was excited.  I felt this was something that would get me in gear so to speak.  I have a room full of wonderful supplies but often make excuses not to go in there.

My husband has never once somplained that I need to clean more or create less yet I continue to “work” on other things instead of making time to create.  I think it is because it is so much fun…maybe I feel guilty?

Well when I saw this challenge on facebook I was excited and determined to get something done right away.  Before I really learned how to make jewelry I bought kits here and there because I was a wannabe that hoped to develop skills later on.  I did!  My sister made a joke once that every time I went to NY I bought beads and tools but I never did anything.  I told her that I was getting ready and my day would come!

So I went into my room of magic and pulled a kit for a necklace.  It was a bit tedious to complete but basic and a lot of fun.  It was a necklace of chain with multiple chains hanging at the end.  On each chain were crystal beads, shoes, and purses.  How could you not like it?

When I posted the picture I got many nice comments.  I wanted to give it to someone and was trying to think who…and then I knew.  We all know someone sweet as pie that always seems to have it rough.  That’s my Lexi.  Mind you I know she has had blassings too but just not enough in my opinion.  I decided I wanted her to have it.

Lexi and I have a history-and a story.  She was my UPS person for years and then she showed up at my church.  Her son, Ryan, is very special to me.  She has always been tender to Megan as well.  Lexi and I also have this funny thing going….about a cow.

I asked Lexi how it all started (probably over 10 years ago).  I think I gave her a gift at Christmas.  The bag had cows on it and she loves cows.  We didn’t  always exchange presents but sometimes one of us would show up with a gift for the other.  Next  time she showed up at church and I got the cow bag back with something in it.  This went back and forth for a long time.  It is amazing the bag is still with us.

Lexi works a lot on Sundays so doesn’t always get to church.  We had lost touch a bit but found each other again on facebook. One day she showed up at church…with the bag.  It was at Christmas time and there was a book , chcoolate, tea, and other goodies.  Such a special collection of things.

Now it was my turn to bless her. I put the necklace in a pretty pouch and  took it to church one week but she was working so I missed her. I sent her an email to see if she would be at church because if she wasn’t I was going to bring it to her job.

She was suprised and I could tell she really liked it.  You deserve it  Lexi-you are special and you are loved!

The beautiful Lexi with the infamous cow bag.
The necklace.
The chains at the end.

Day of creativity Mychele!

Originally on Blogger June 11, 2011

My friend Mychele and I always try to get together at least once for a full day in the summer.  Mychele lives two hours away.  I know that doesn’t seem like much but we both have very active lifestyles and families that keep us busy.

When I heard about the 30 Days of Creativity challenge on facebook (I still need to write and thank that person), I challenged my friends to come on board with me.  I was especially trying to pull in my friend Em (whom I  have never met but love dearly) and Mychele as they both have young children which means they HAVE to be creative every day.

I guess it wasn’t planned that way, but it ends up Mychele and I had a whole day dedicated to creativity.  We could not have done this without the infamous daddy Chuck taking the girls off for a day.  I do not think we would have gotten much done with Sophia and Gwendolyn in on the act!

Packing for Mychele’s was a riot-it looked like I was moving out.  I had to bring everything I wanted to talk to her about because I did not know when we would have this opportunity again! I knew Mychele wanted to learn Onestroke (I am a certified instructor).  I also knew she wanted to play with aluminum wire after seeing a picture of my bookmarks.  I had some things I wanted to show her and a mother’s bracelet I made her years ago that needed adjusting (we are adding Gwendolyn’s name).

Aluminum wire and tools-love this stuff.
Paint, apron, brushes, papers…
Beads, books, other secret stuff…
Mychele, smaller than the last time I saw her,greeted me with a beautiful lavender plant and a beautiful smile.

I had to leave at a certain time for my daughter’s birthday celebration so we discussed a schedule to make sure we got everything done.  We started by playing with Onestroke first as that was the most involved.  She took right too it and I left her with videos to keep practicing.

Then I showed her some new things I was getting ready to try.  Of course I can’t tell you about those….yet.

Then she got really creative with lunch. I saw her spreading a thick layer of guacamole on bread and I knew all would be well.  She added shreeded cheese and tomato and grilled it.  Or salad was spinach and fruit with a poppyseed dressing, It was WONDERFUL and I have since created that lunch again twice and my guests loved it as well.

After lunch Mychele started playing with the aluminum wire.             I could tell she loved it as much as I did.

We finished off the day with henna. Mychele is a henna artist that is very well known in the area. That is how I first met her-but that is another story. I love henna and can really get wild in the summer.

Mychele and I talked about our time together.  She had made a comment that I was doing the teaching-that she wanted to teach me something.  In discussion though we realized we need to accept that it is ok for people to “give” us things even though we may not feel we are giving back.  I have often blessed someone with something only to be blessed by someone else the next day.  I have had people share with me but it may be another that I share with.  The great things about close friends is there is no keeping of tabs.  We give/share for the love of it -without expecting anything in return.  I have found however, that what goes around comes around.  Everything I give away or share seems to come back in some way.

I felt totally blessed being with Mychele.  Packing for the trip made me get organized a bit.  It also made me get in my creative place where I love to be.  I learned two new great recipes from lunch, got a wealth of ideas, and came home with henna.  Mychele had also been through some of her other supplies and shared things with me. We both made out like bandits!  I also have some ideas/projects in the works that I bounced off Mychele and her responses solidified my ideas.

It was a wonderful time!  If only Ms. Em could have joined us…

Beading-Jeweled Napkin Rings


Originally on Blogger 6/3/11

30 Days of Creativity: Day 3

An inexpensive easy gift to make for yourself or someone else.

Materials:

Assorted beads

Wire Cutters

Memory Wire (smaller size about 2.25in)

Round Nose Pliers

Directions:

Cut a length of wire that goes at least once around  (a full circle).

You can also make it longer so the napkin ring goes around more than once.

The great thing about memory wire is that it will keep its shape over time.

Using round nose pliers make a loop at one end of the wire-this will keep beads from coming off.

Start putting on beads.  Alternate colors,sizes, and types.  It is best not to follow a pattern.

When the wire length is covered, make a loop in the other end as well to keep the beads on.

Using an eclectic group of beads will make your napkin rings go with any season/color.  While these are easy to make-it would cost a bit to make many sets so it is best to make one that you really love!


Screen Shot 2015-04-17 at 12.52.39 PM

On the left the ring goes around more than once, on the right-just once.  While I like it going around twice,it takes more beads and time to do a set this way.  They are just a beautiful with one full loop around.


Screen Shot 2015-04-17 at 12.52.46 PM

This is the set I made myself after making some for my daughter for her Christmas table setting.After making hers, I had to have a set.  Using a variety of colors, they go with  any occasion.

For the Love of Lavender


Originally posted on Blogger 6/2/11

30 Days of Creativity: Day 2

When getting the wash out of the dryer today I breathed in deep and felt happiness-I don’t find laundry particularly uplifting but my lavender sock sure helps.

I do not use fabric softeners.  I don’t know that they really do or don’t make a difference but I do not like the smell of them. Also, my husband has sensitive skin so using anything with perfumes is an issue. Before I took the course in Herbalism at The Herb Corner, I didn’t like the smell of lavender either.  All the lavender I had smelled was very strong and artificial-I had never smelled the real thing.

Once I met the real stuff at The Herb Corner, I was in love! I don’t know how I came up with this idea but it is my best yet!  I made a lavender sock for the dryer.  You can use your husband’s old sock (cannot have holes in the foot/heel area) or you can use a cute little girl’s sock.  As these are functional for me-I use husband’s old socks for the dryer.  I use the cute socks for sachets/gifts.

Supplies Needed:

Lavender buds (about 1/4c per sock)

Sock

Ribbon (if making a cute sachet)

Directions:

Make sure your sock has no holes in the foot/heel area.

Put about 1/4c lavender buds into the foot area of the sock.

(I keep my lavender in a jar and to fill my sock I put the sock on the jar and turn it upside down)

Put the sock on top of the jar and turn over to fill easily.

Screen Shot 2015-04-17 at 12.57.41 PM

When you have the lavender you need, look in ankle area of sock and make sure all buds are clear.Get all lavender to bottom of sock and tie a knot in the sock right above the bunch of lavender.

Screen Shot 2015-04-17 at 12.57.48 PM

Take tube part of sock and bring it up around the lavender part of the sock (knot is now hidden).

Screen Shot 2015-04-17 at 12.57.54 PM

When using my husband’s sock, I stop here and this is ready to stay in the dryer*

Screen Shot 2015-04-17 at 12.58.13 PM

If making a sachet, I now would add pretty ribbon-usually purple because of the lavender.

Screen Shot 2015-04-17 at 12.58.20 PM

I leave the sock in the dryer so it is there when I throw a load in.

Opening the dyer will now be a heavenly experience and your clothes will smell great.

Simply use the sock until it no longer has a scent-I then throw the whole thing away.

If you do this, let me know how it goes!  For me it really makes a difference.

*I have had husband socks open up once or twice-ribbon, twine, sewing it shut would be a good idea!

Let’s Do This!

Originally posted on Blogger 6/1/11

I will laugh whenever I hear that statement-one my grandson said to me one day as we packed the car.  He is almost three but I admit I was taken aback and wondered where he got that from.  A bit later, I was telling my husband about it and he asked Zander who taught him to say it and he said Mimi.  That’s me!  Although I would like to take credit-I still am in denial!

I have my own little room in my house loaded with all kinds of creative materials-I know others do as well.  I have stamping supplies, paint, all kinds of jewelry making supplies, altered art stuff…just too much stuff to name.  My problem is I always make excuses to not go in there-cleaning the house, clearing paperwork, and I admit-playing on the computer.  My unfinished writing projects suffer from the same excuse.  While I am still very productive and seem to get a lot more done than most people (that is according to them not me), I still get frustrated.  In my heart-creating things is what I love best.  Whether it is an essay about something I do not want to forget or a new piece of jewelry. I opened an Etsy shop a while ago but there is still nothing in it.

Now since all of you tell me I am amazing and you don’t know how I get so much done-you must suffer some of the same frustrations as I do.  I had planned this summer to block out days for creating and possibly even inviting friends to come as well.  When my friend Sara said how much a pain it is to cart stuff place to place I thought maybe reporting in to a friend or posting a picture of what you created would be enough to hold you accountable to do so.  My friend Em and I thought about picking a day and talking on Skype about our plan to create something then checking back in on Skype to show off our work-the pressure of accountable would keep us on task.

Well there is a blogger out there that has set me up-and I will write and thank her. This is just the challenge I need: every day of June to create one thing.  It could be a blog post, jewelry piece, painting, or recipe.  For some of you it may be a mud pie in the back yard or a finger painting piece with your little one.  While there is a structure to this, there is enough flexibility for all my creative friends.  I know I have many creative friends that could benefit from this challenge as well-I will tag a few and hope you pass it on!  Let’s share our pictures everyday! I am off to create my first piece (even though I am not sure what it is yet)! If you would like to get together to create-in person, through Facebook or through Skype, please let me know! I do plan to announce days through Facebook for people to come down and work on projects!

Happy Creating